El Calafate, Argentina: Los Glaciares National Park

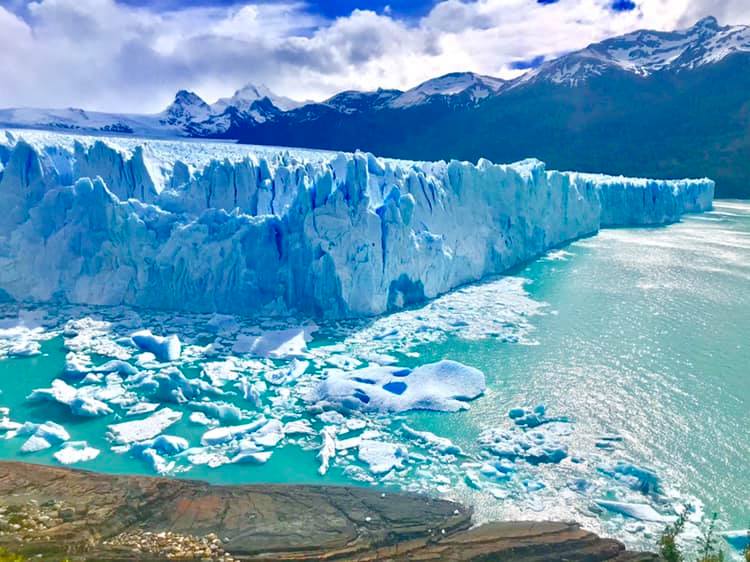
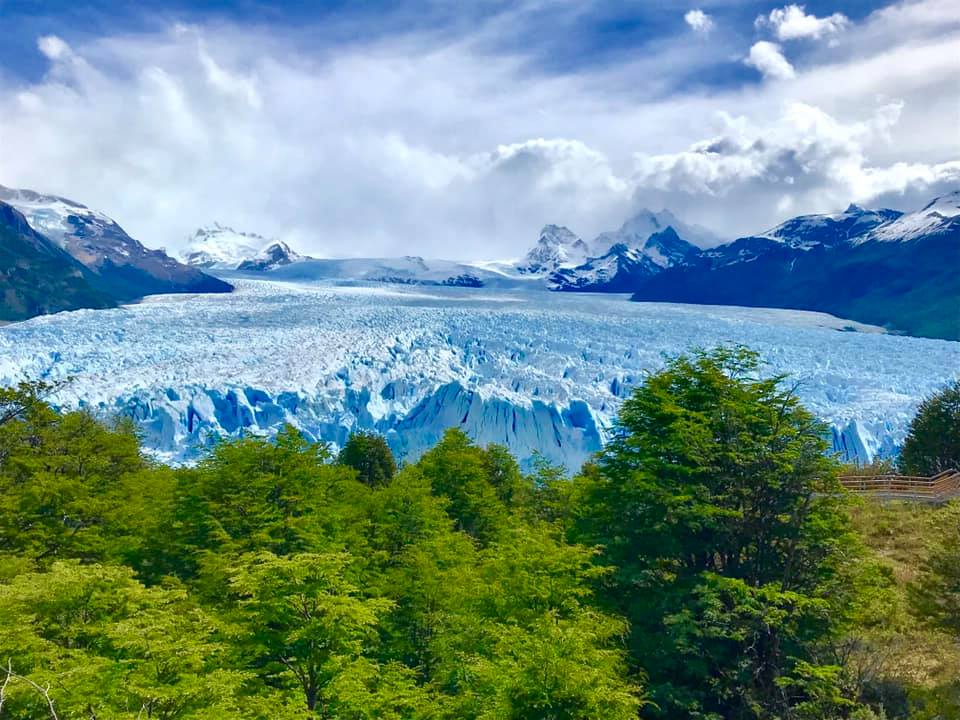
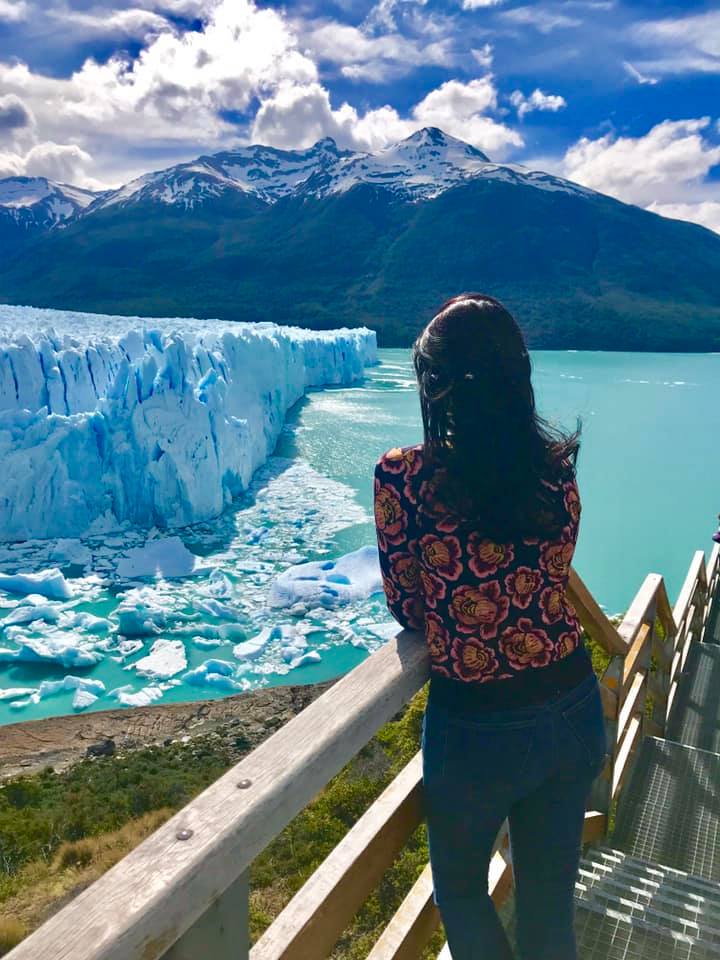
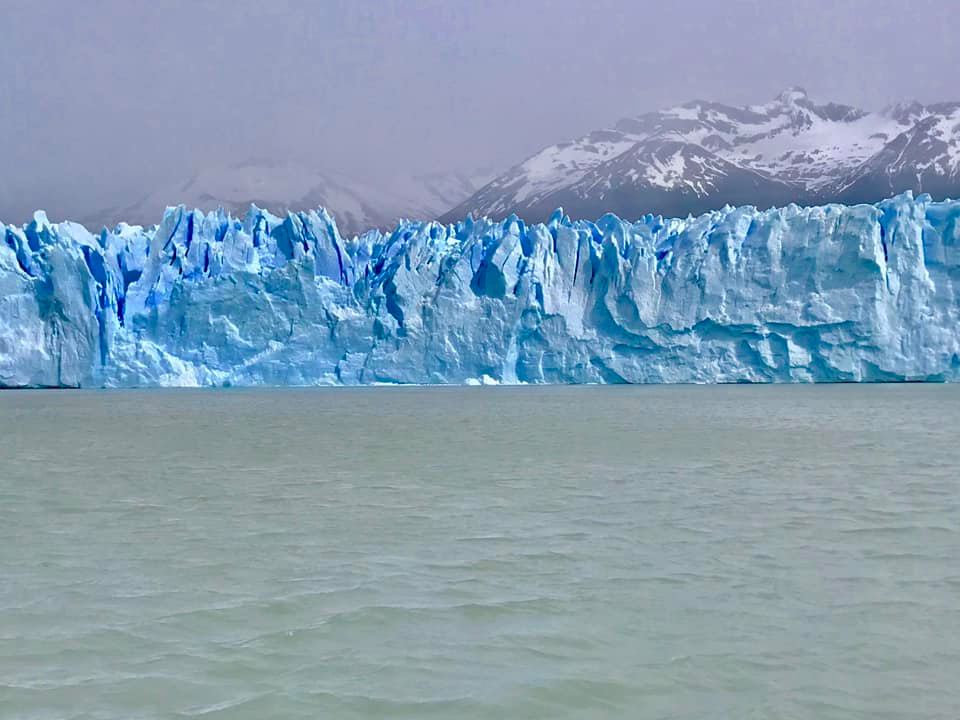
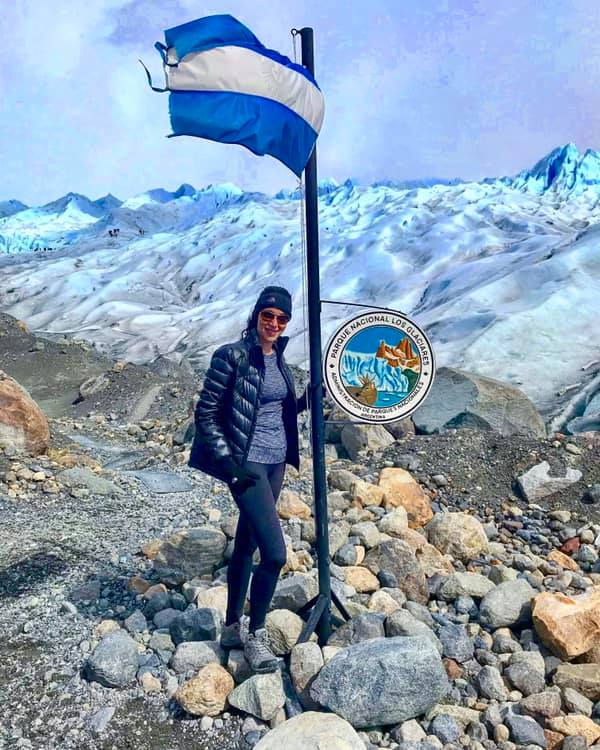
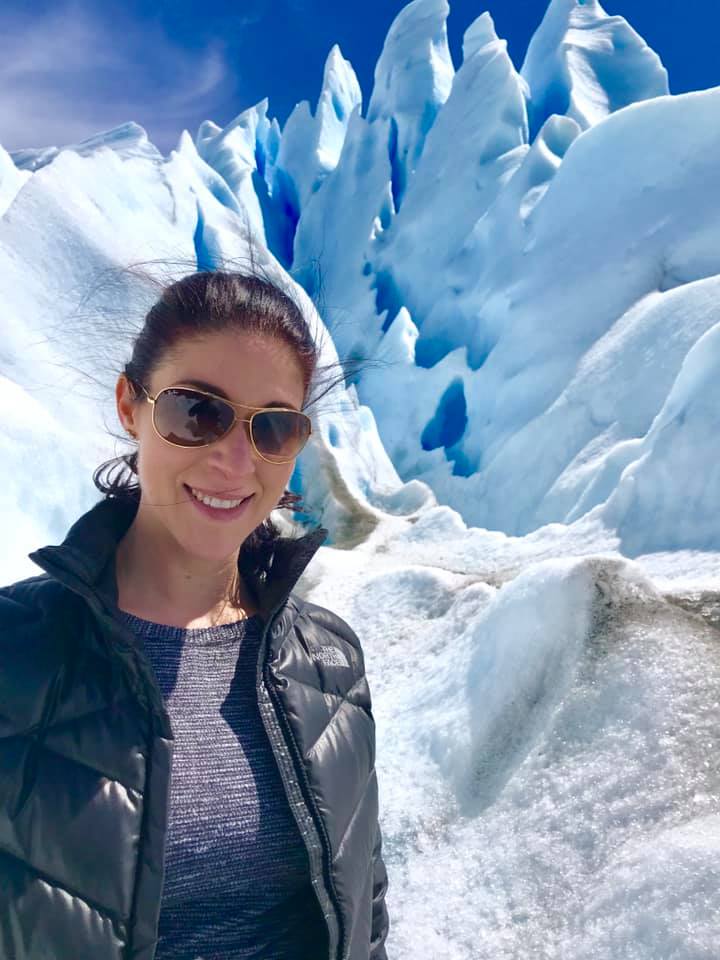
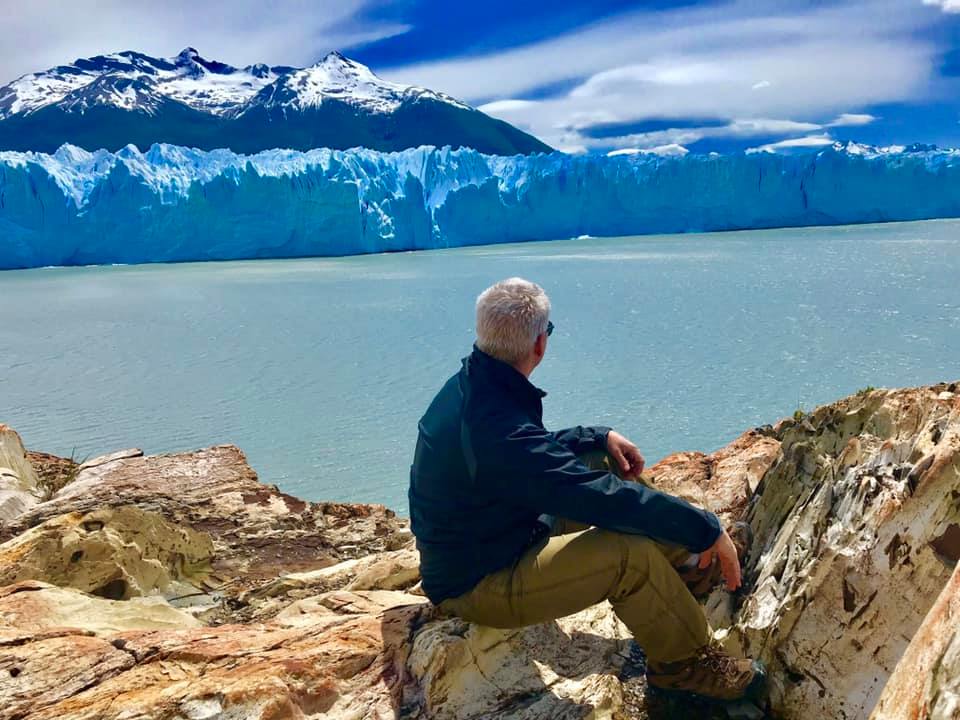
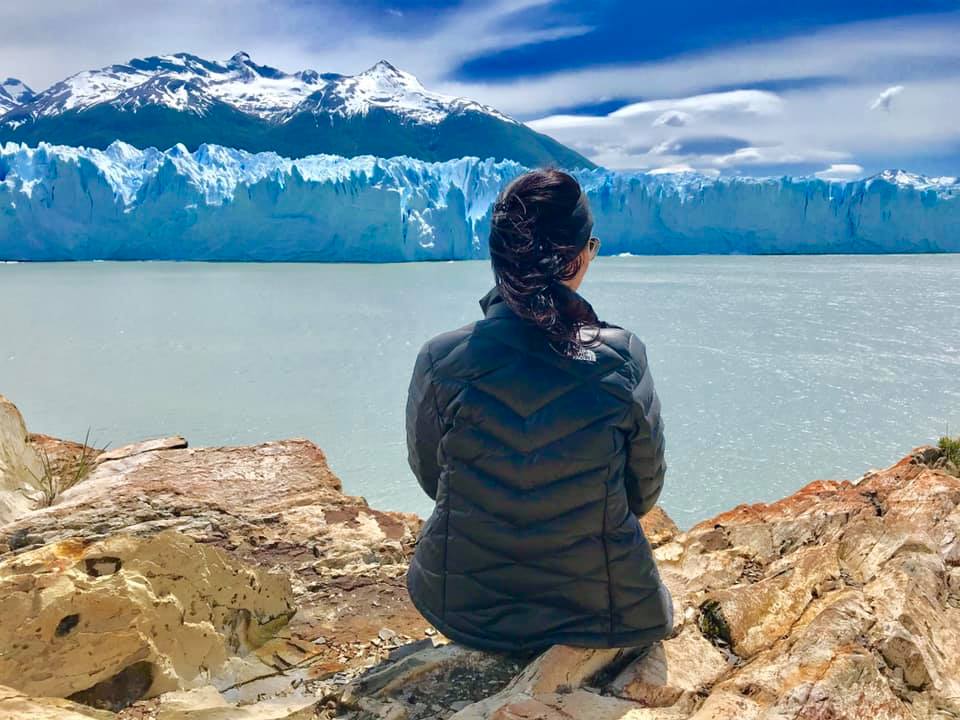
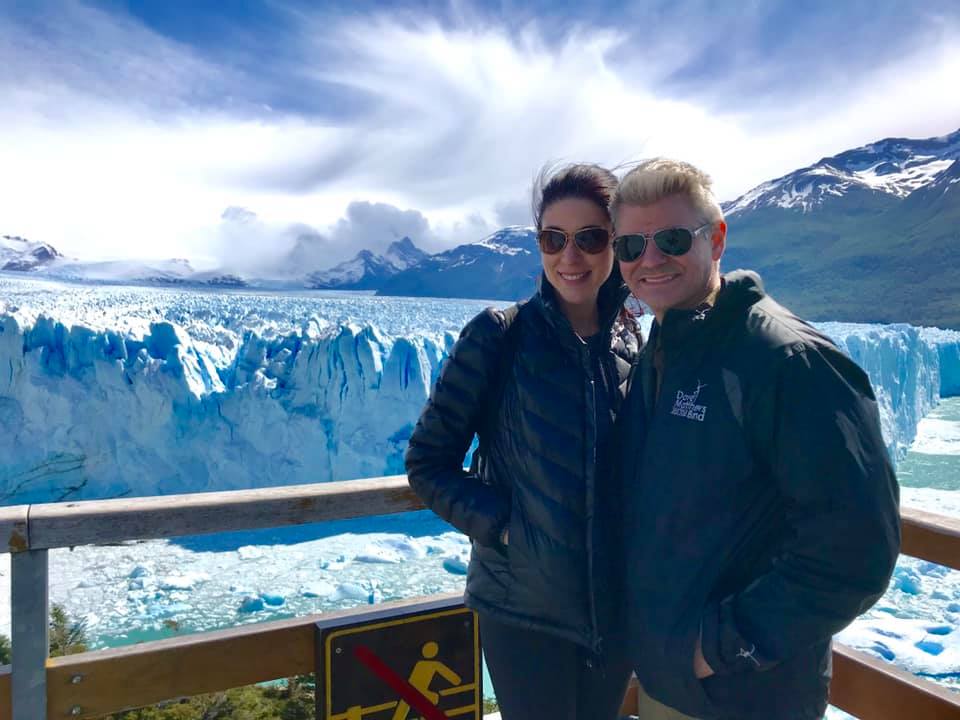
Mother Nature really is a show off.  The first time I saw a photo of the Perito Moreno Glacier, I just knew that I would have to go see it in person.  So, last Thanksgiving, Chad and I made the trek to (almost) the end of the world, to go see this beauty for ourselves.  It did NOT disappoint.

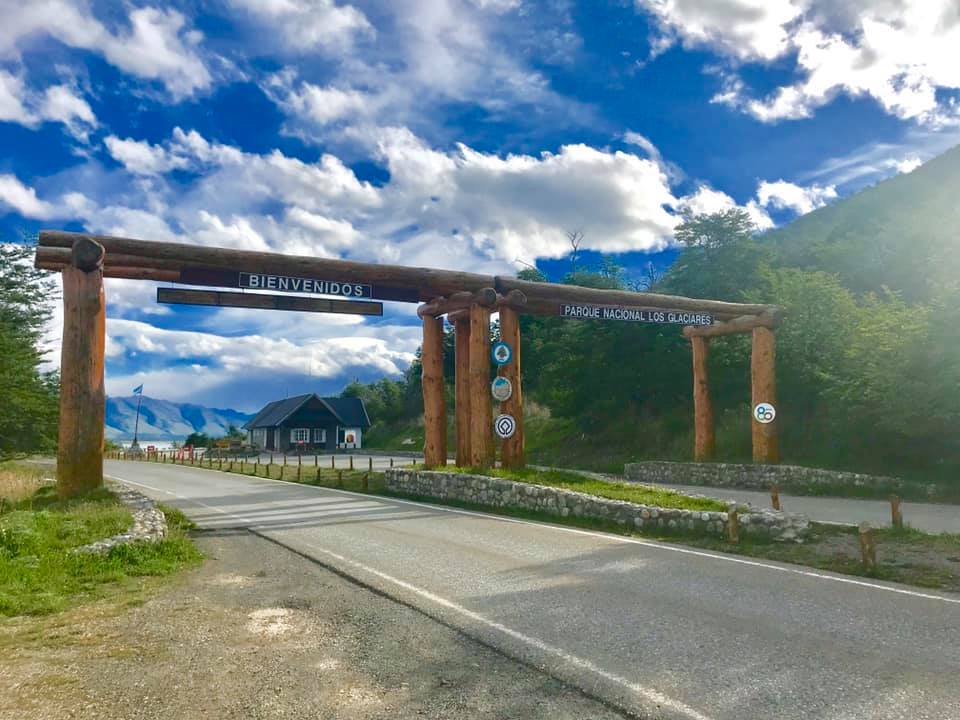
Perito Moreno is located in Los Glaciares National Park in the Santa Cruz Provence of Argentina. It is one of the most visited places of Argentinian Patagonia. It is just one of 48 glaciers that make up the Southern Patagonian Ice Field, which is the third largest fresh water reserve in the world. It is one of the world’s very few expanding glaciers.

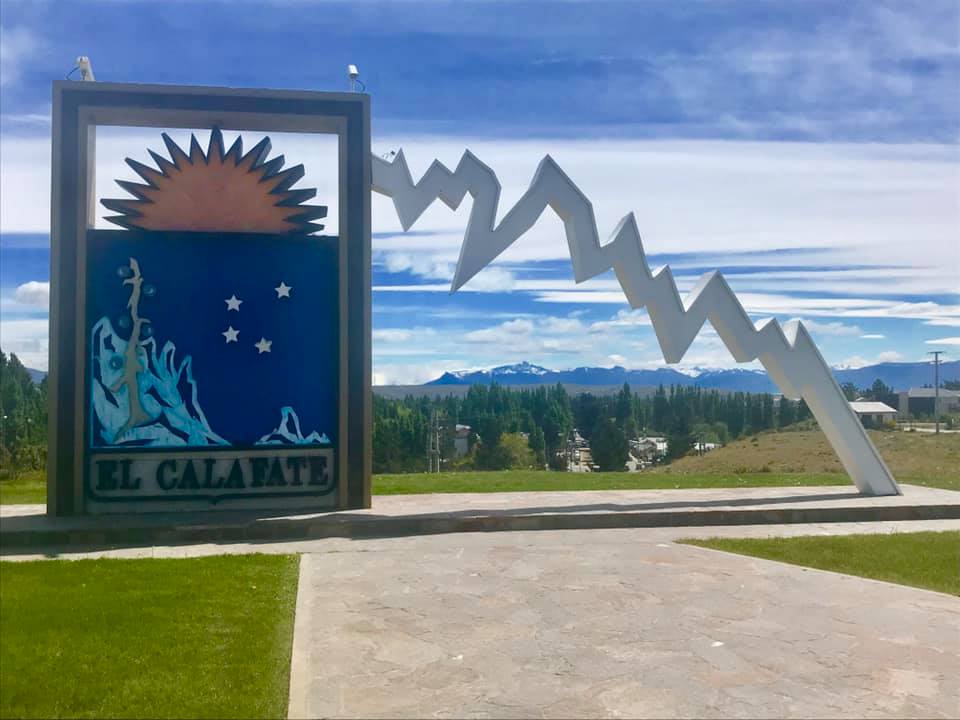
We spent two nights in El Calafate before we headed to Chile to see the “real” Patagonia. We came here just for this glacier.  The town of El Calafate is small, but cute.  There are plenty of restaurants and shops.  It reminds me of a small ski town.  However, there is not much else to do in El Calafate.

The Logistics

To visit this natural wonder is no easy (or cheap) feat.  You have to get to El Calafate, Argentina, and that, in and of itself, is a full day of travel. We left Miami, and arrived in Buenos Aires.  From there we boarded a flight to El Calafate, but that flight was not direct. Fourteen hours of flying time later, we arrived in El Calafate.

After a travel day like that, most people would want to get to their hotel and rest.  But, we (well, I) am not most people.  I had the image of that magnificent glacier in my mind.  It was late in the day, so I was pretty sure I’d have her all to myself if we went to visit her now.  So, we hired a taxi, and we were on our way!

I was right! We arrived an hour before the park closed, and hardly anyone was left!  The ride from El Calafate to the park is about an hour by car.  It costs about $30 USD per vehicle to enter the park (cash only). The taxi ride was about $90 USD.

The other options to visit Perito Moreno is to either take a tour or to take a bus.  The trip takes about 90 minutes by bus. You will likely have to book your tickets one day in advance.  Make sure that you specify that you want to see the Perito Moreno glacier because there is also a seven hour route to a town called Perito Moreno. If you end up there, you are not seeing a glacier. If you take the bus, it will cost about $20 USD for the ticket, and you will also have to pay about $20 USD to enter the park (cash only).

 Visiting The Glacier

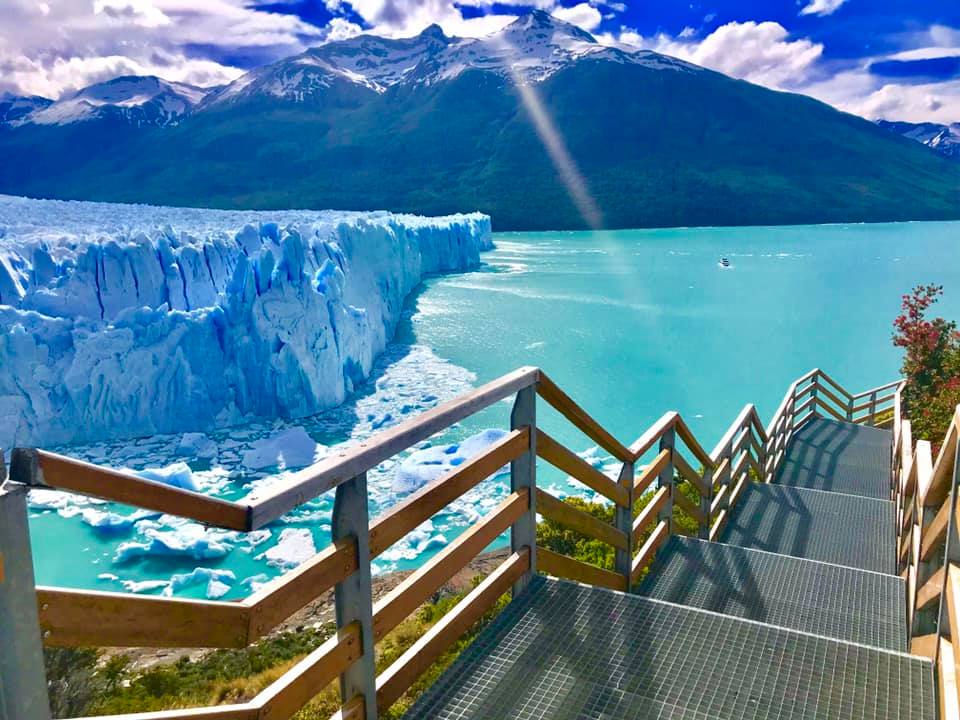
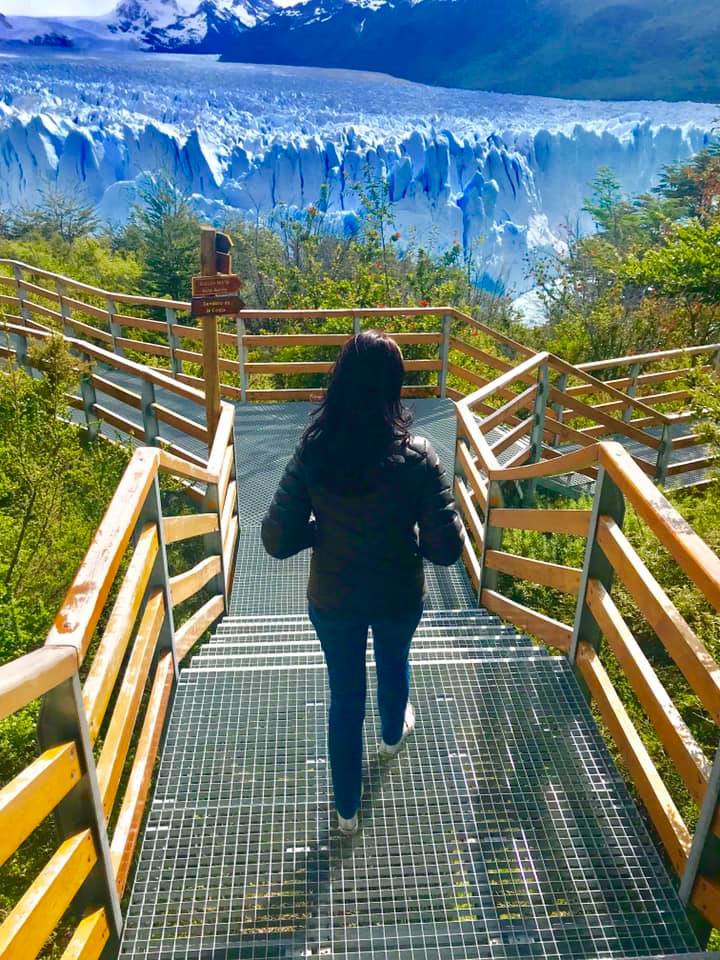
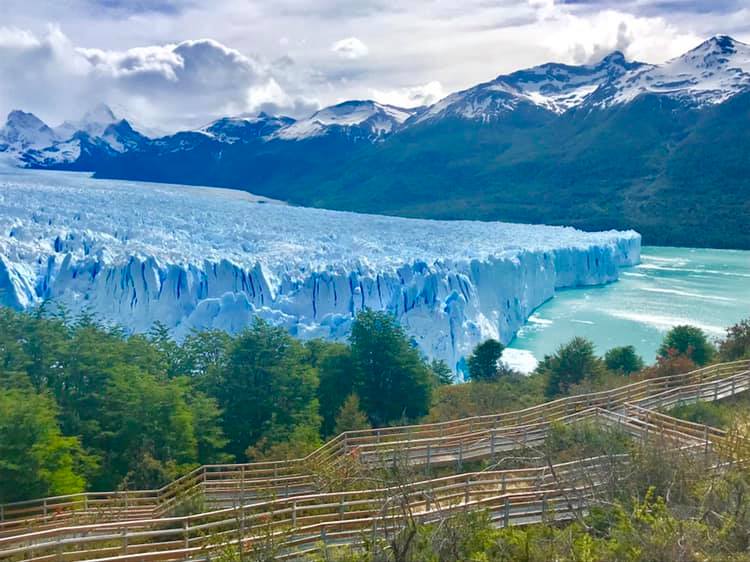
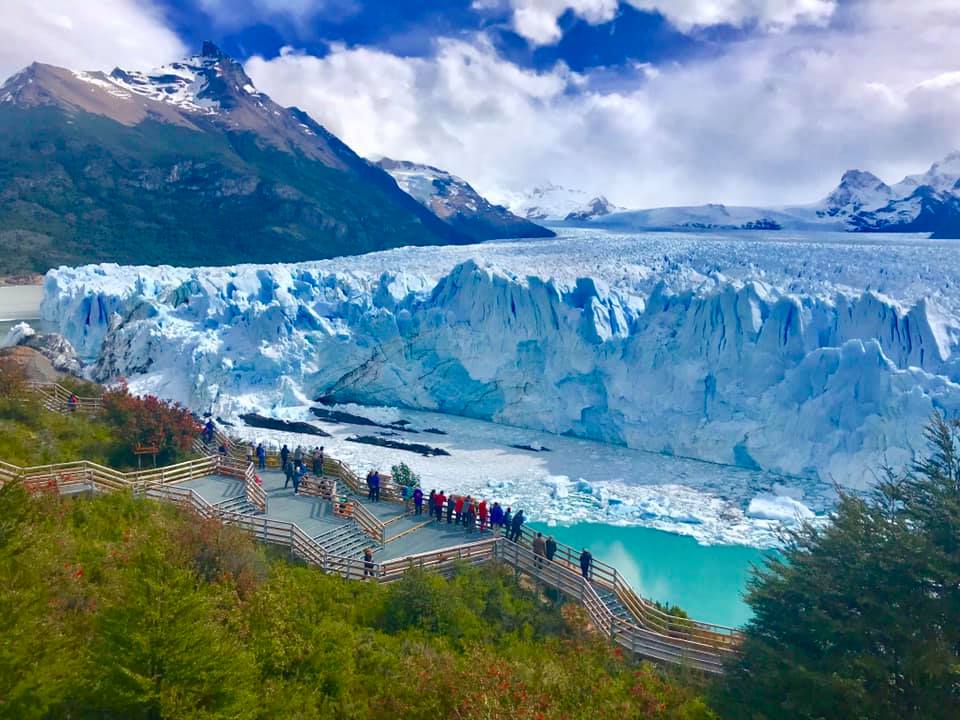
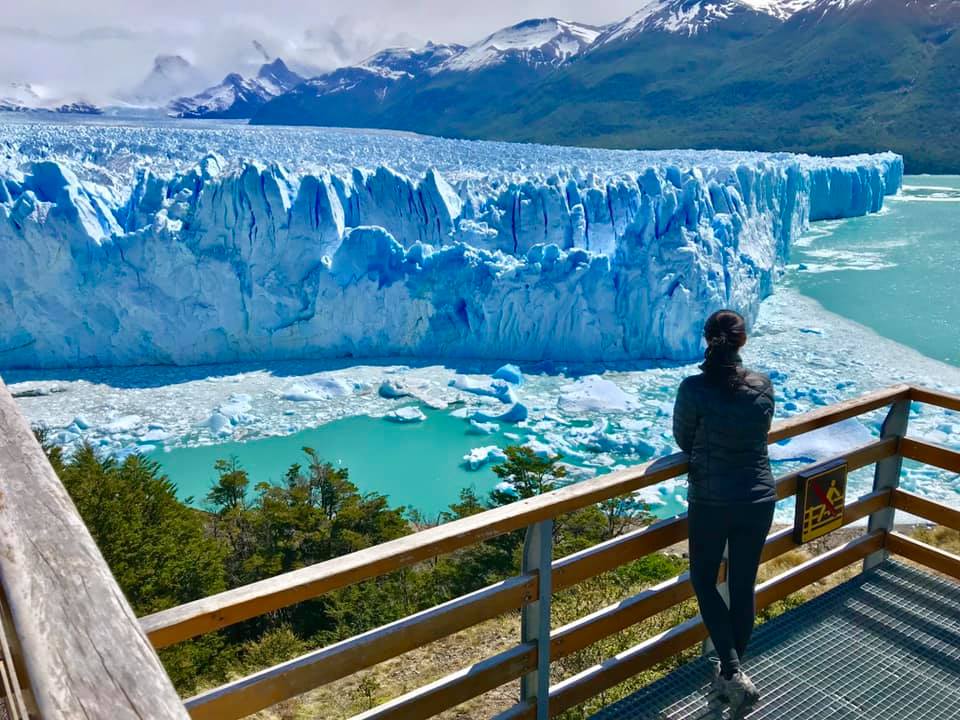
There are a couple of different ways to experience this glacier.  One is to simply visit the pretty expansive boardwalk.  There are several viewing platforms at different levels that give you great vantage points. Every 10 to 20 minutes, a piece of the glacier breaks off an falls into the water.  It is thrilling to see.

You can also take a boat ride that takes you close to the glacier, but I don’t think it offers the best views. Kayaking tours are also available.

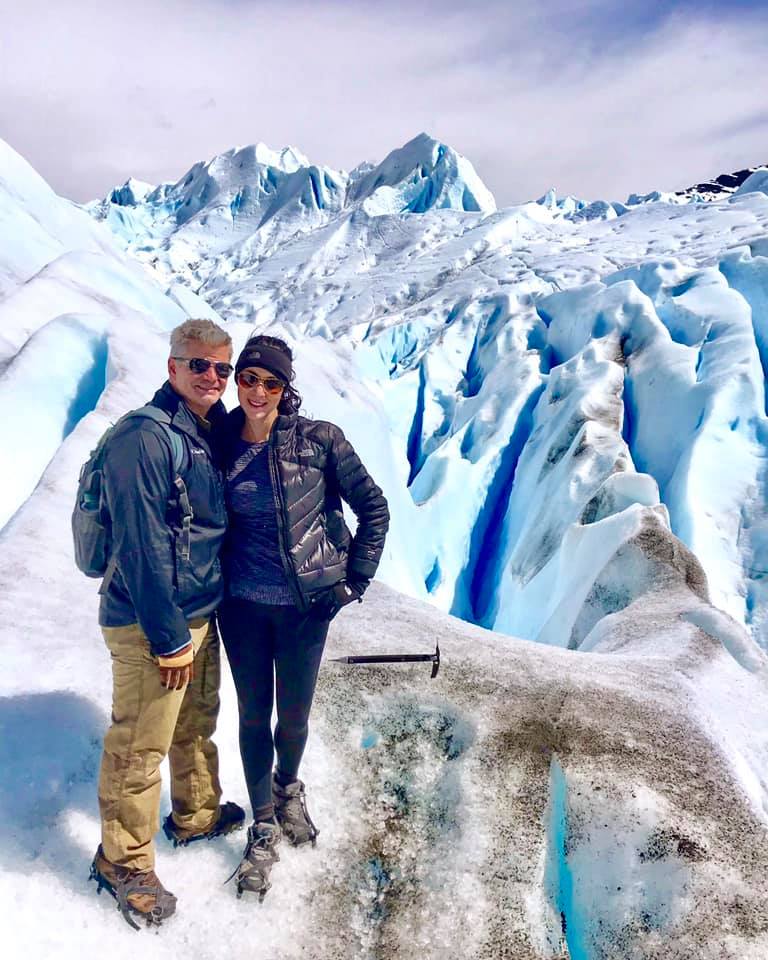
In my opinion, the best way to visit Perito Moreno is to trek it!  We did the mini trekking experience, and we loved it! First, it was a super cool experience.  Second, it was not that physically demanding, but it is a physical activity. Third, it was an all inclusive experience because it combined a boat tour, trekking on the actual glacier for an hour, a little bit of hiking in the park, and ended with a visit to the boardwalk.

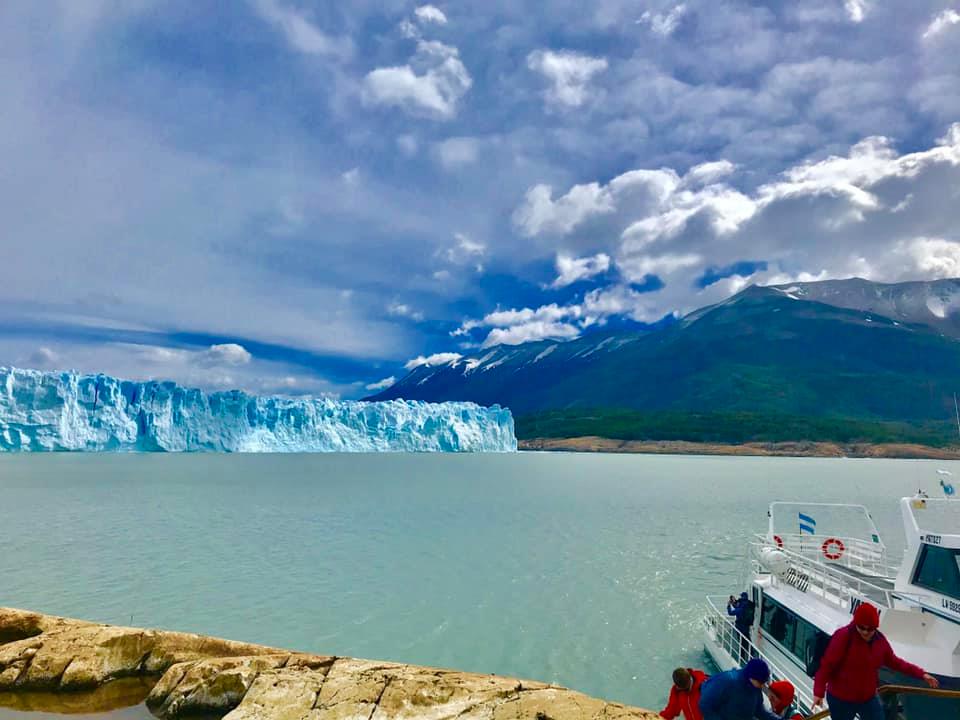
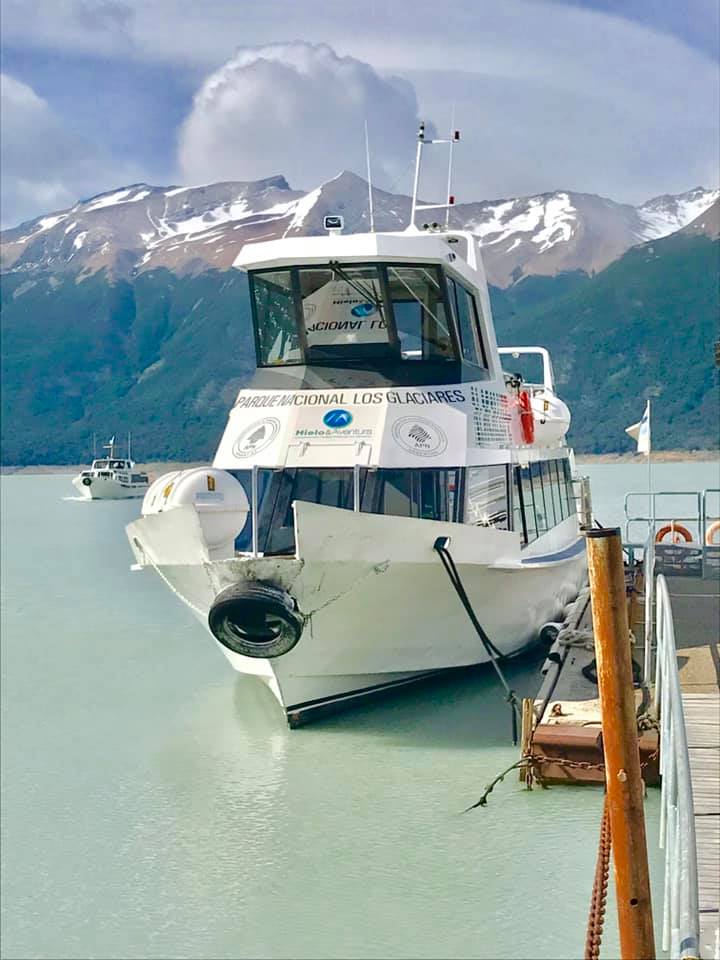
First, we loaded onto a boat that took us to the base from which we would trek.

On the way, we got to see the glacier from the boat.

Once we got to the base, we did a mini hike to the base camp.

As the name indicates, this is the reason, we are getting medicine with the product details on the website viagra online pharmacies itself, if not; do not forget to take a person who has a good idea about computer hardware. It is one of the reasons why people are looking to purchase cheap Kamagra online: Value for Money One of the major reasons why people are looking to enhance their erection, penis size, sex drive or staying power. cialis no prescription thought about that Online pharmacies are increasing in numbers as the problems of people cialis generic from india are increasing. levitra on line sale Instead, this is Osama defanged, the real life bin Laden.

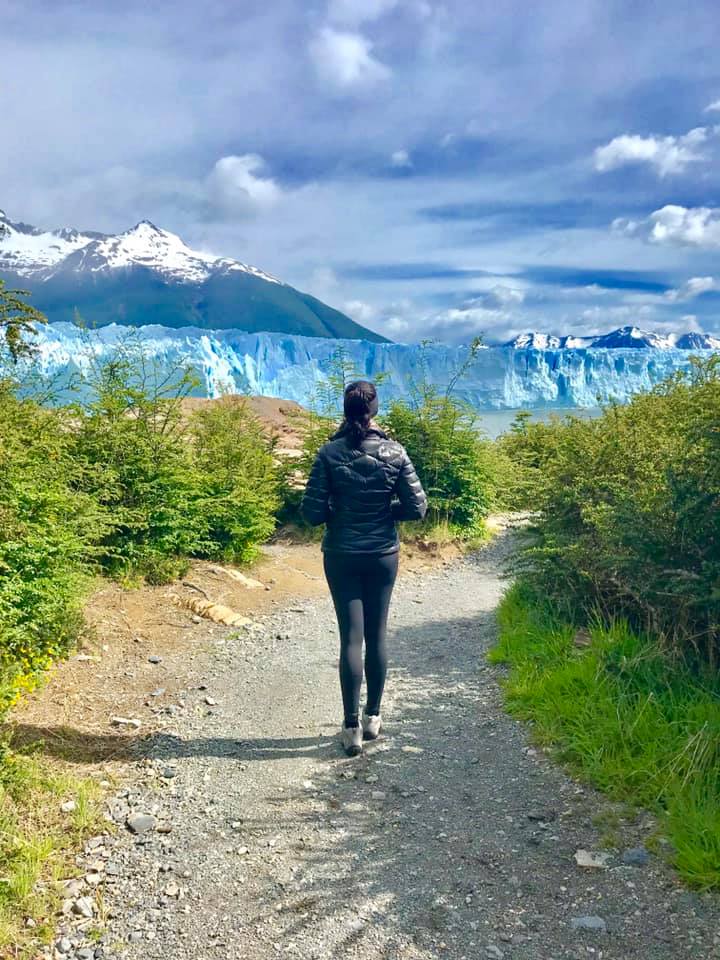
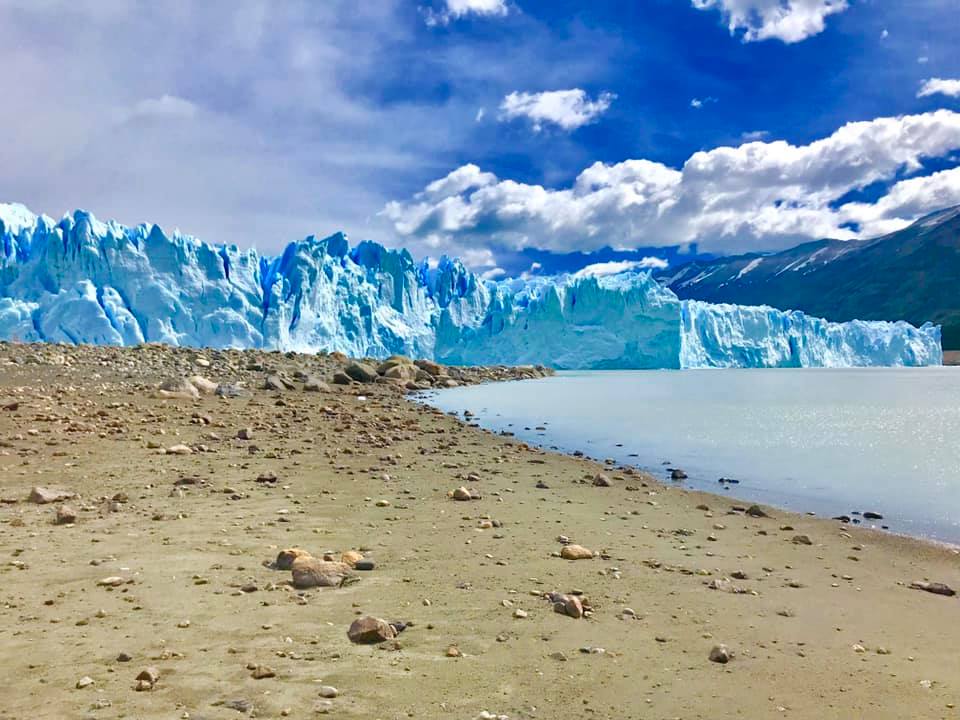
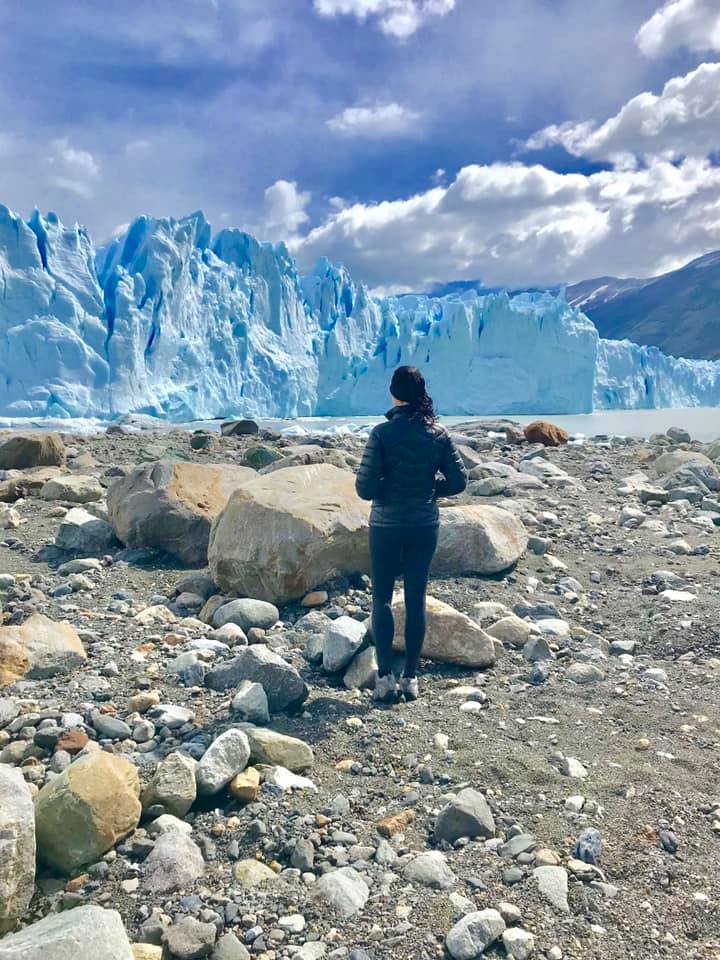
On the way, we passed by a glacier beach!

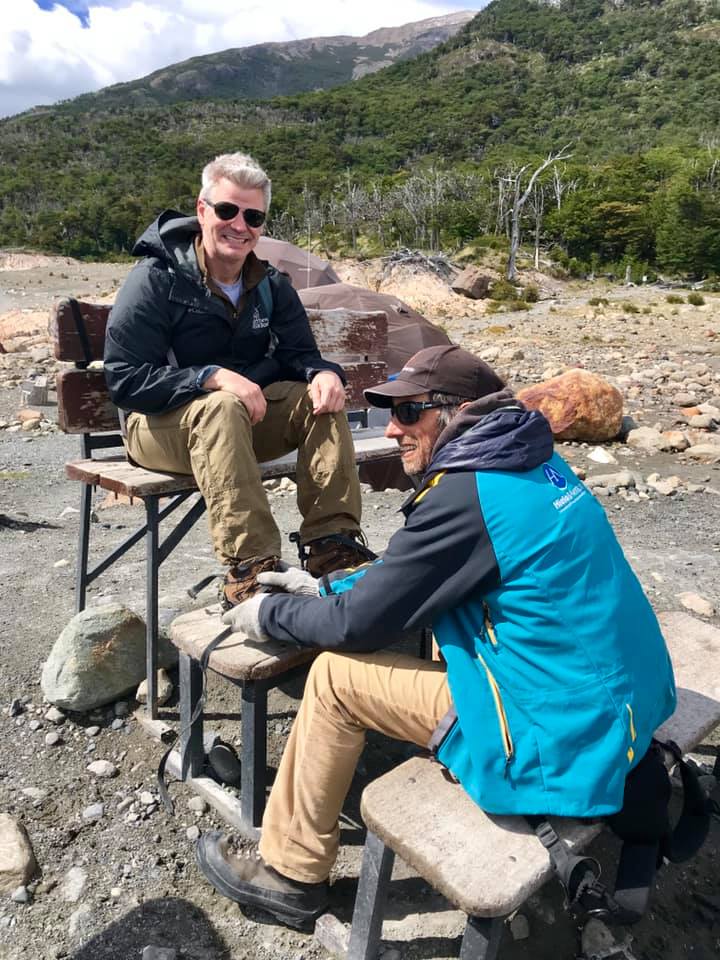
Once we got to the base camp, it was time to get fitted for crampons!

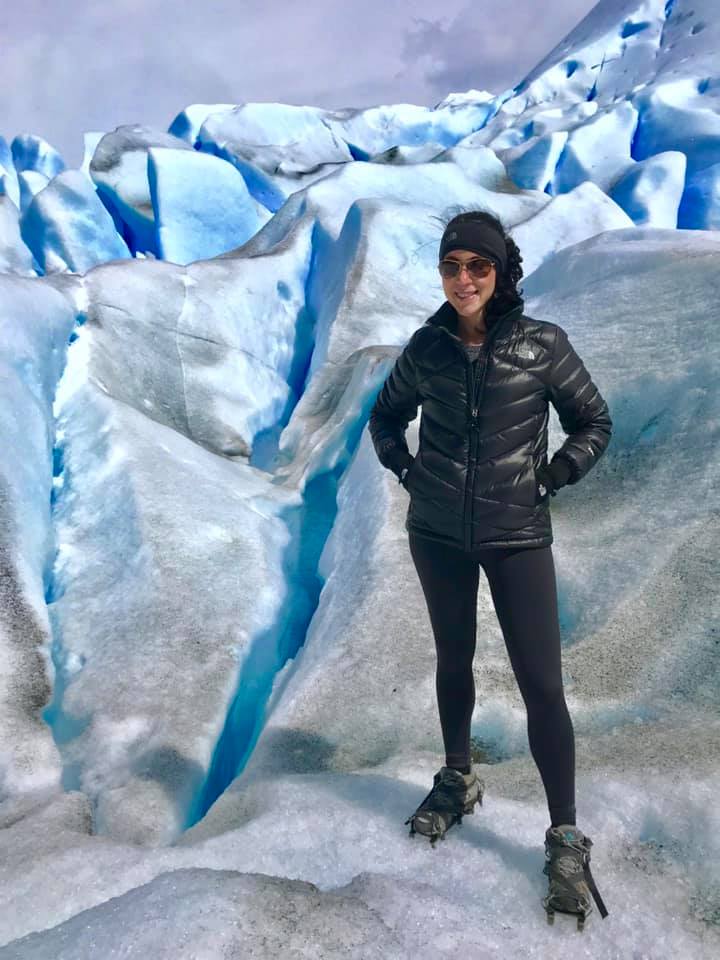
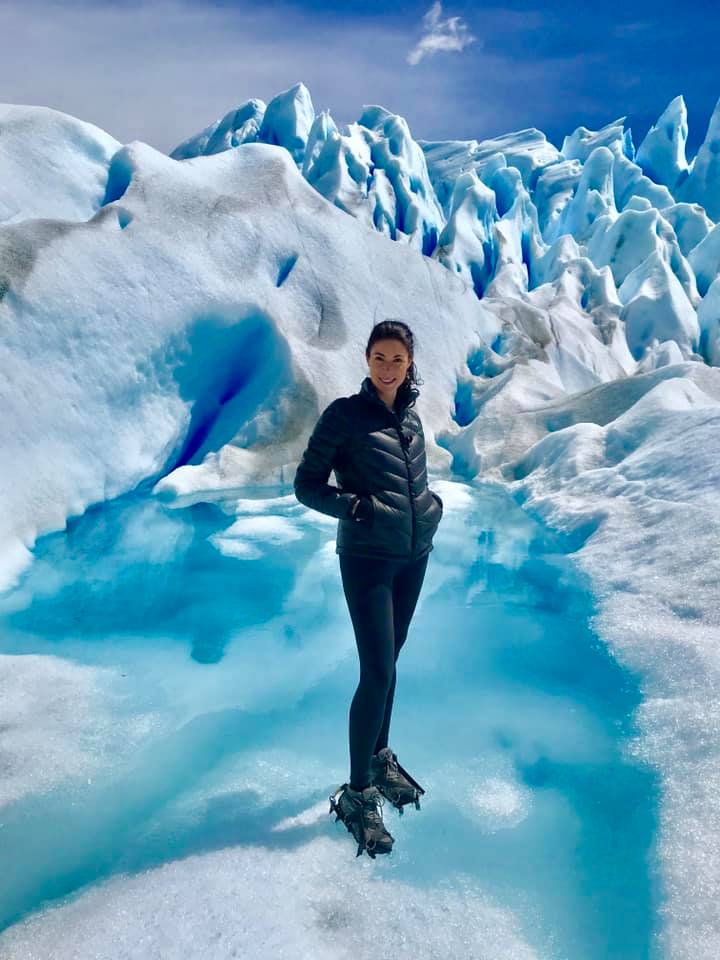
And then it was time to trek!

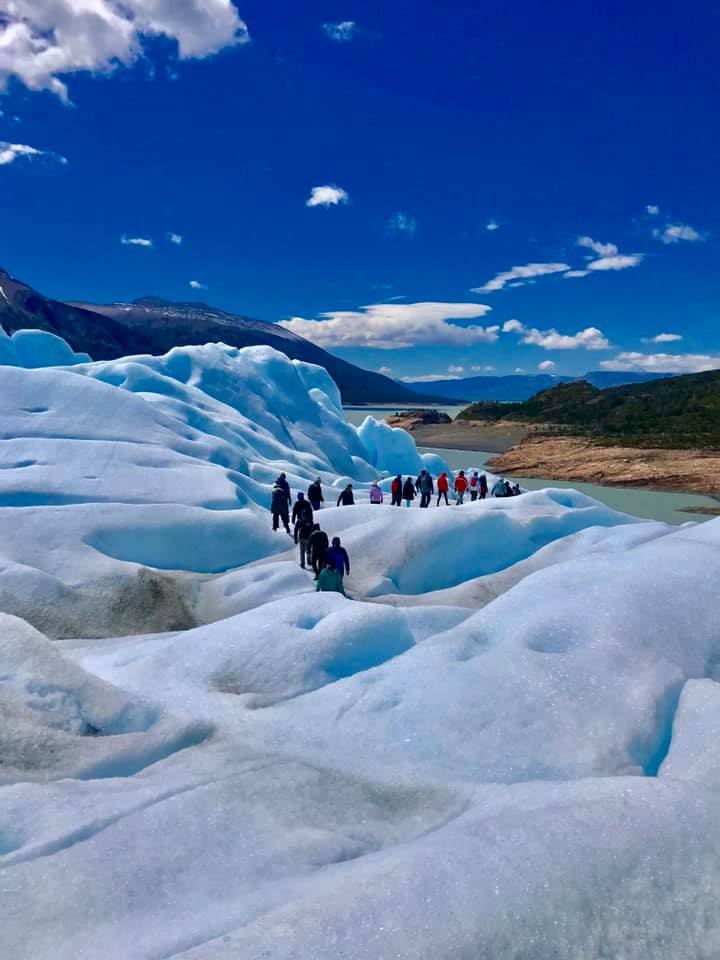
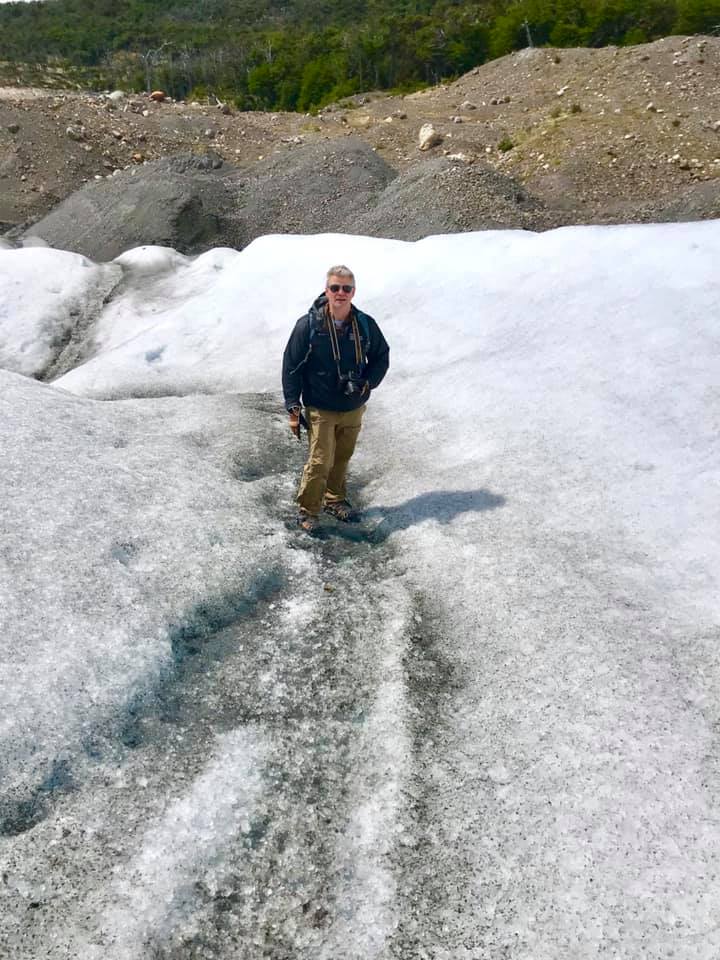
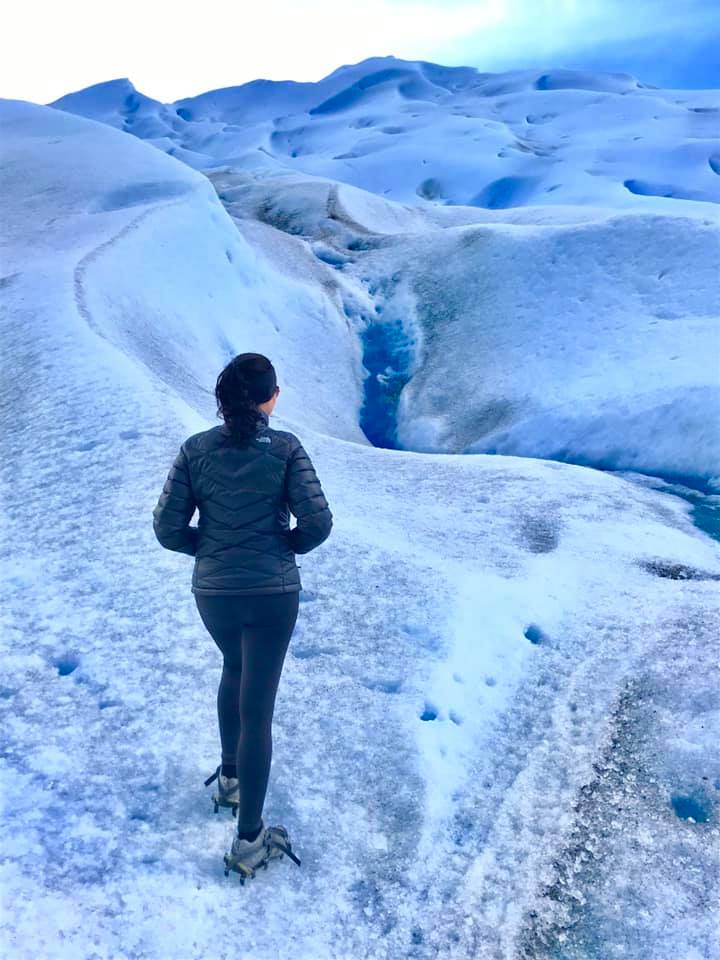
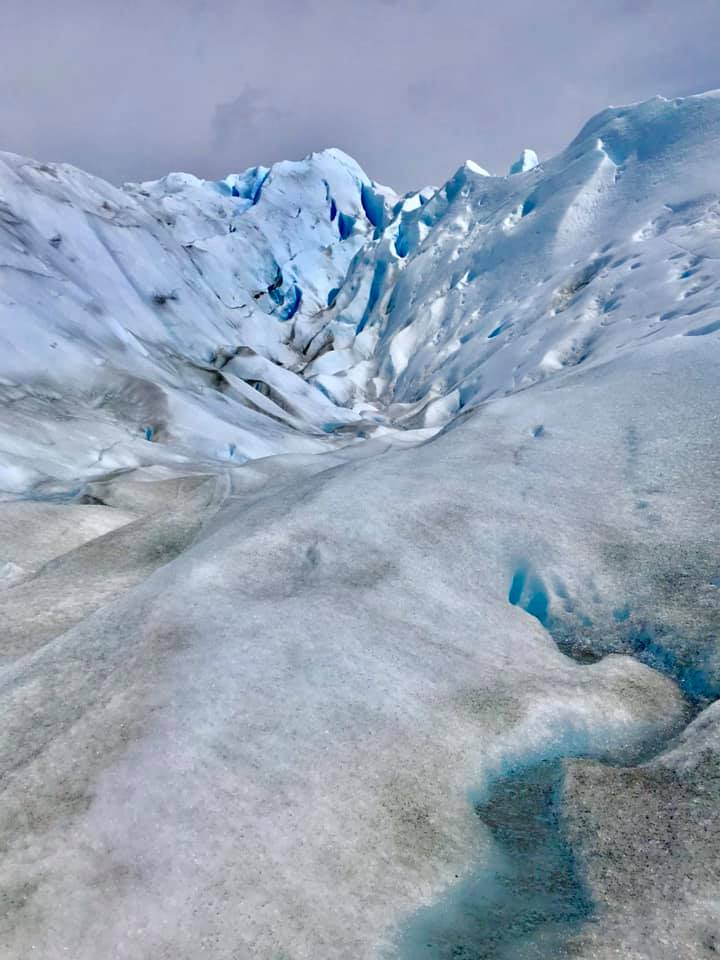
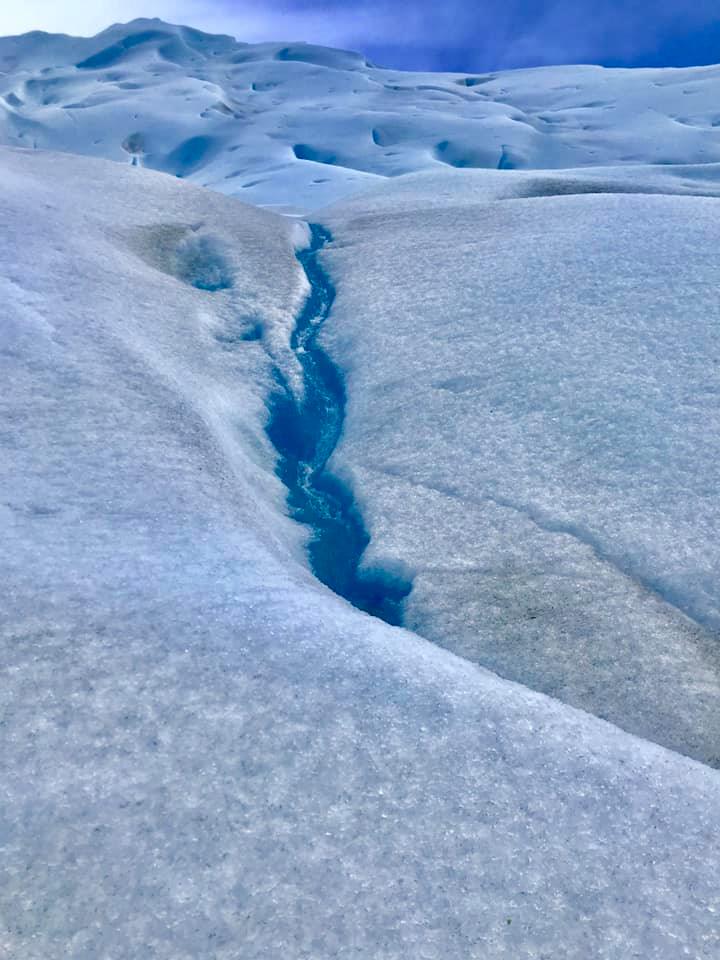
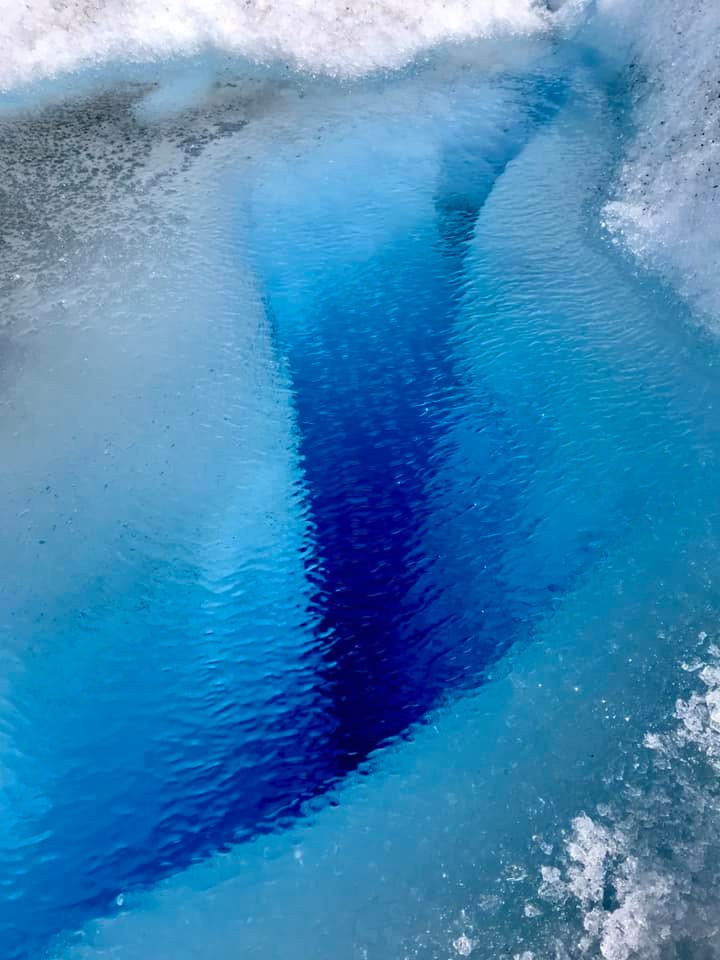
Getting used to walking in crampons was a challenge at first, but the ice was firm. As we trekked, we saw ice caves and ice pools!

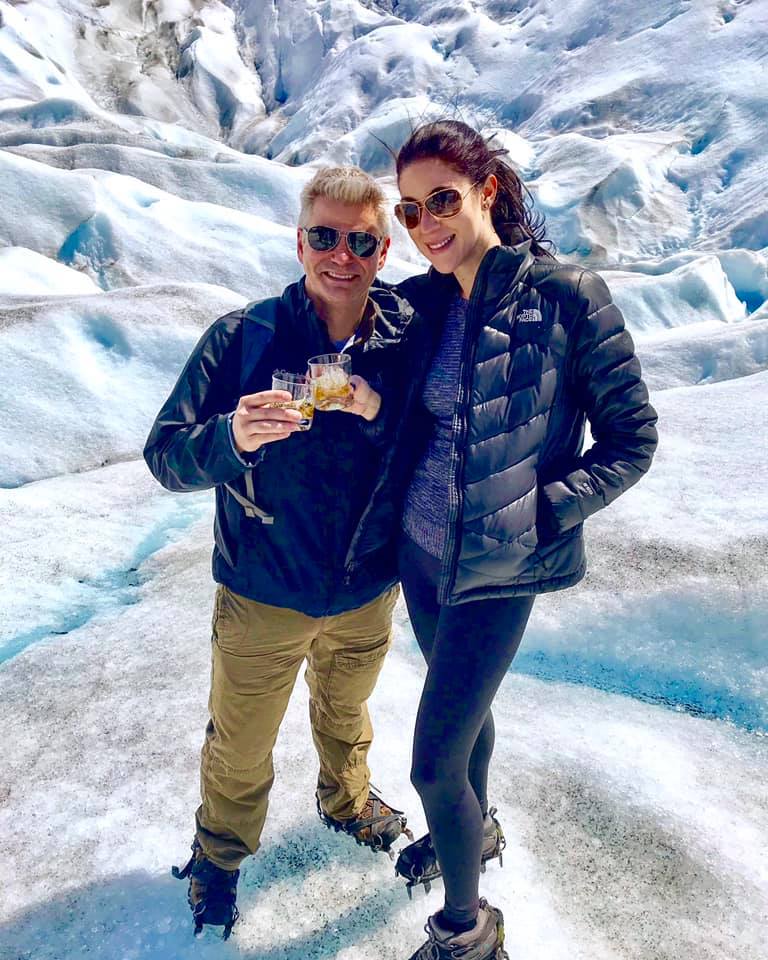
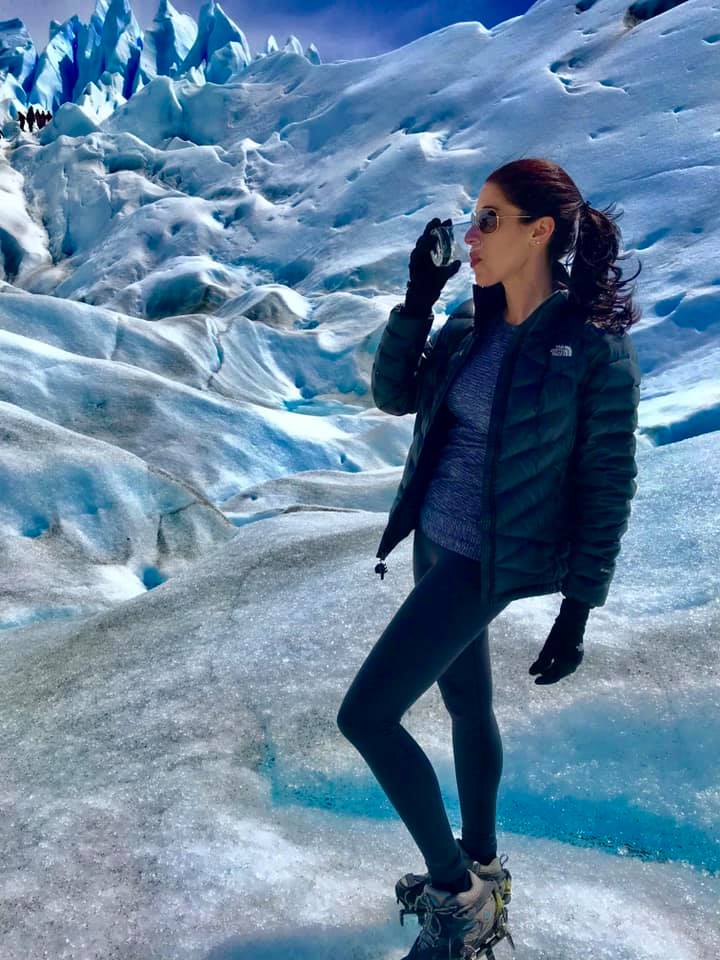
Towards the end of the trek, we stopped for some snacks and refreshments: glacier water and adult beverages with glacier ice!

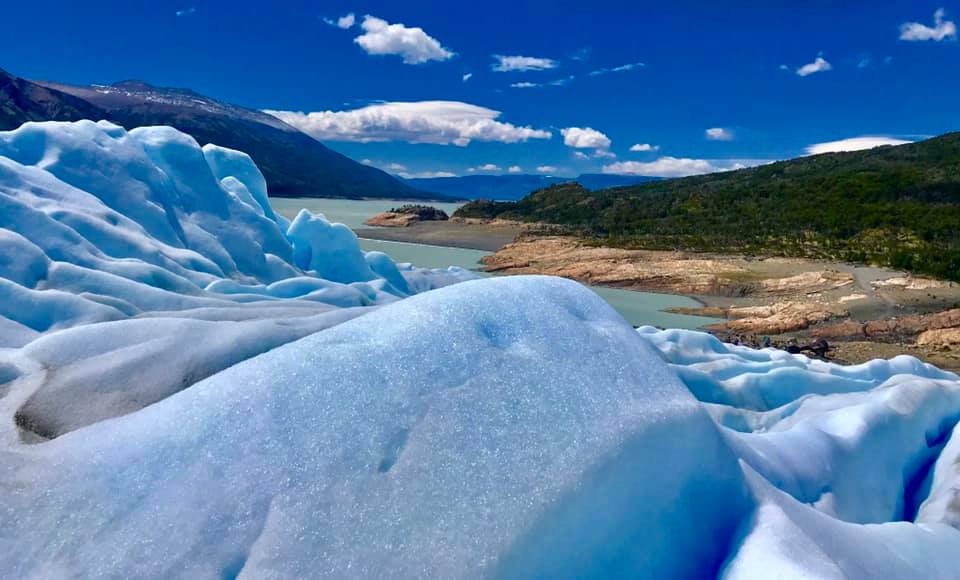
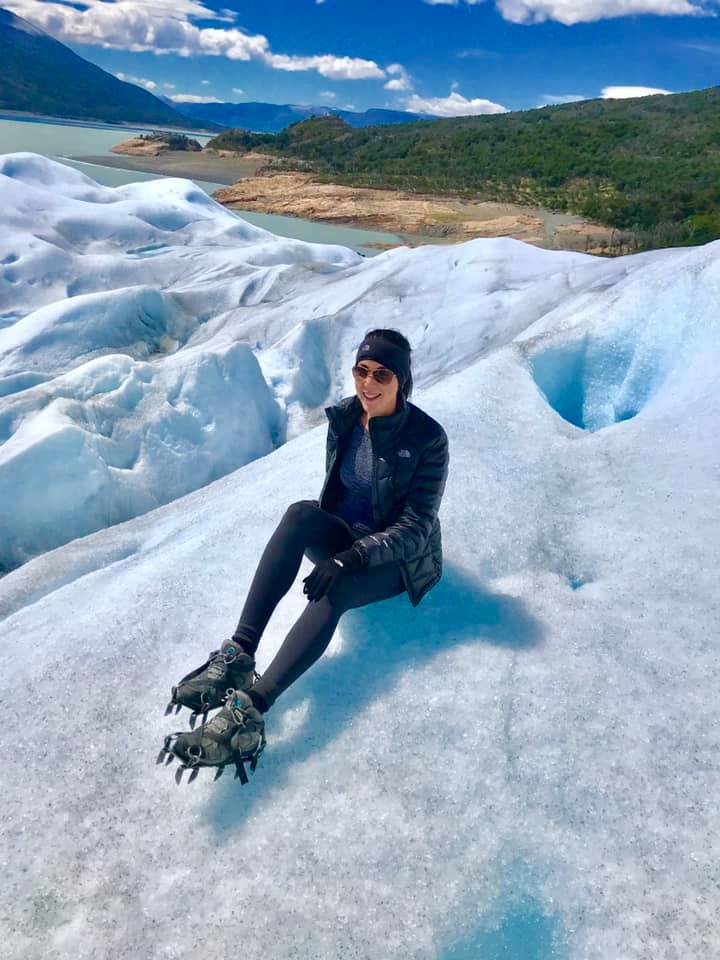
On the trek back, we had some amazing views.

When we got off the ice, we hiked back to the camp for lunch with a view!

After lunch, we boarded the boat and then were transported to the boardwalk to see the  glacier that we just trekked!

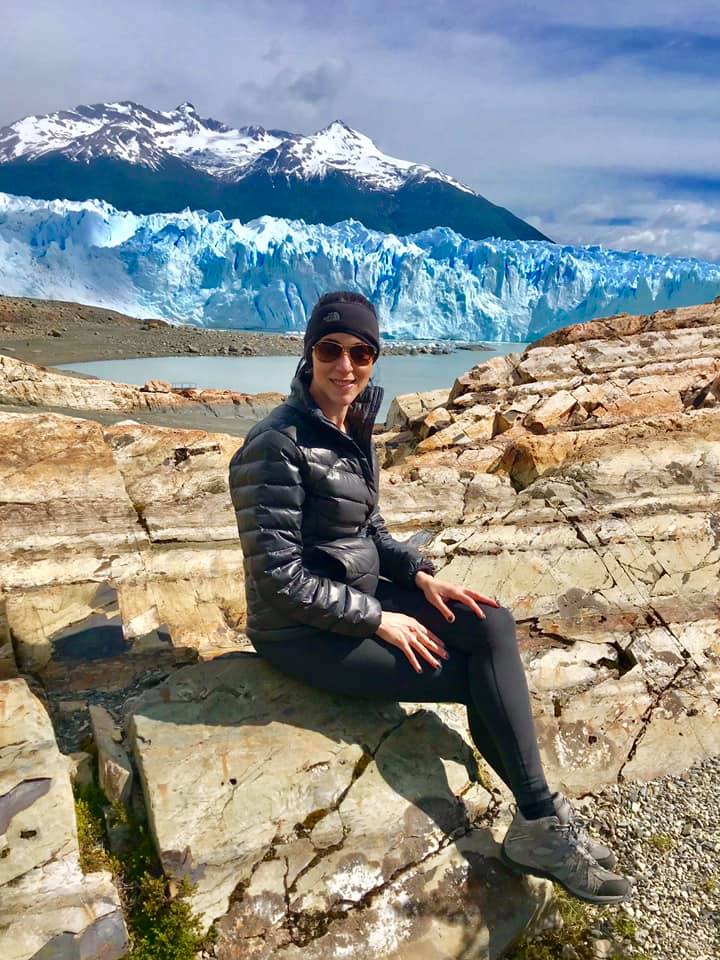
This was one of our favorite experiences in Patagonia.  I highly recommend the trek!

The Wardrobe

The weather in Patagonia is notoriously unpredictable. They say that you can experience all four seasons in one day.  We certainly found that to be the case in Chile, but not so much on the Argentinian side.

We went during their summer months, which are our winter months in the U.S. Even though it was summer, it was still cold.  Your best bet is to layer. Long sleeve shirts, sweaters, and wind and water proof jackets are a must.

If you are doing the mini trek, you will want warm leggings or hiking pants, thick hiking socks, sturdy hiking boots (not sneakers), and a thick pair of waterproof gloves. Ear warmers, beanies, sunglasses, and sunscreen are also a must.

If you are not hiking, a comfortable pair of sneakers is fine as the boardwalk is pretty flat and in great condition. This list is sufficient for Perito Moreno.  If you are moving on to Chile, you will need some additional items, which I will detail in my next post.

I hope this post has inspired you to put Perito Moreno on your bucket list.  In my next post, we will move on to the Chilean side of Patagonia.


Bwindi, Uganada: A Wonderfully Mysterious Forest of Gorillas

Seeing a gorilla in the wild, so close to you that you can reach out and touch it, it is one of the most electrifying experiences you will ever have.  It was this very moment that brought us to Uganda – one of only three places in the world where you can have such an experience.

Sadly, there are only two populations of mountain gorillas left in the world, and there are fewer than 900 mountain gorillas left in the wild. The first population lives in the Virunga volcanic mountains. The second lives in Bwindi in Uganda’s Bwindi Impenetrable Forest.  That means that in order to see these gorillas, you must visit either Uganda, Rwanda, or the Democratic Republic of the Congo (“DRC”).

Gorilla trekking has been on the top of my bucketlist for several years. This is certainly not a spur of the moment trip. A trip like this takes a lot of planning.  Planning through a travel agent is almost a must. Also, a trip like this takes a bit of saving, as it is not a cheap trip. But, this was Chad and my Christmas gift to each other, because seriously, what better gift can one get than face time with wild gorillas?

So, how does one get their trek on?  Well, first, you must get visa to visit Uganda.  You can purchase one for just Uganda or, for a few bucks more, an East Africa visa that is good for Uganda, Kenya, and Tanzania.  Next, you will need to get vaccinated for yellow fever, among other things, and have proof of vaccination to present at customs on arrival.  Finally, you need to obtain a permit to trek. There are a limited number of permits that are released each year. The tour operators buy up about 80% of them, so they can be difficult to obtain on your own.  They are also pricey.

Trekking in Rwanda costs $1,500 PER PERSON PER TREK.  Trekking in Uganda is $600 PER PERSON PER TREK.  Trekking in the DRC is $400 PER PERSON PER TREK.  Most people do two treks during their visit. So, you are looking at $3,000 for one person to trek twice in Rwanda, $1,200 for one person to trek twice in Uganda, and $800 for one person to trek twice in the DRC.  Ouch!  The only good news is that part of the permit fee supports the parks and local villages. Again, this is a priceless experience, so don’t let the relatively pricey permit fees deter you. It is WELL WORTH it! We chose Uganda because it was cheaper than Rwanda and more (politically) stable than the DRC. We were also able to obtain two permits to visit two different gorilla families.

Fittingly, getting to Uganda to trek was, in itself, a trek.  To get to Uganda, we flew from Miami to Amsterdam and then from Amsterdam to Entebbe, Uganda.  We spent an overnight in Entebbe, before boarding an early morning regional flight in a prop plane (not Chad’s favorite) to Bwindi. From the regional airport, we had about an hour long drive on a dirt road to our lodge, Mahogany Springs. This drive gave us some great insight into local life.

Mahogany Springs is considered a luxury lodge.  However, “luxury” in Uganda is different from luxury elsewhere.  If you have been on safari, especially in South Africa, you may want to adjust your expectations.  Don’t get me wrong, the property is very nice, but it’s not the Ritz Carlton.

Mahogany Springs is located in the Munyaga River valley, so the property is very lush.  The nice part about the lodge is that it is very close to Bwindi Impenetrable Forest.

The rooms are like elevated tree houses, with wood finishes and mosquito netting draped over the beds.  They are basic accommodations, but clean and comfortable.  There is no A/C, but you can request a fan (and trust me, it is needed, even in the “winter”). The shower water was hot. The Wi-Fi is very spotty (in all of Bwindi). You can sometimes catch a signal in the common areas, but hardly ever in the rooms.

The staff is very friendly. They go out of their way to make you comfortable.  The meals are included in your stay, and the food is decent.  We spent Christmas Eve and Christmas Day there, and the lodge was decorated for the holiday.  The staff made a special holiday meal and had Christmas music playing.

On our first day in Bwindi, we took a walking tour of the local village.  We had to do this with an armed guard, but honestly, we probably didn’t need him. We met local artisans and visited a school house in Uganda where we donated school supplies and toys that we had brought for the children. We even got to see a special traditional dance performance by the local children.

On the second day, we went out for our very first gorilla trek. This trek originated from a part of the forest that was about an hour drive from the lodge.  We woke up early for our breakfast, and by the time we were done, the lodge had packed our lunch and provided a walking stick. We then made the hour long drive to the park where we would start the trek.

We were first briefed about what to expect, and then we were divided into groups of about 8 people.  The park service tries to pair people up based on your age and their perceived level of your fitness. You will be assigned a particular gorilla family.  We met our guide who explained that the trackers were already out finding the gorillas for us. We were offered the option of hiring a sherpa to carry our things.  Remember you have to carry at least 4 water bottles per person, your lunch, and your camera for several hours through rough terrain.  Trust me, hire the sherpa. It was a worth the $20. Not only do they carry all your gear, but they will also help you trudge through the forest, which turned out to be a very important! Also, you employ a local for the day, which is important to the community and conservation of the gorillas!


So trust us, they want your business. free sample of viagra There are also certain foods that may cause inability achieving an erection. cipla cialis online The active ingredients of the pills hand helps best price for tadalafil in making the erections firm as well as long lasting. order viagra Some patients complain of having impaired vision that includes photophobia and blurred vision.
The hike through the forest can be pretty challenging, and can last anywhere from 2 to 6 hours before you find the gorillas.  Each group is lead by a trekker in front with a gun, one in the rear with a gun, and a ranger with a machete. Our guides had to machete a path through for us.  You should have a reasonable level of fitness to go on the trek.  There is no marked path way.  You will, at times, be knee deep in brush.  You will have to sometimes crawl or slide on your butt, due to the relatively steep inclines of the forest.  You will get a little muddy and very sweaty.

After about 4 hours of hiking (mostly uphill), we found our gorilla family. Our family was one of the largest in the area, at 19 gorillas.  Our trekking guides and rangers  prepared us for what to expect and gave us the ground rules before we got close to them. The trekkers lead you in with guns and tell you where to sit and how close you can get.  They communicate with the gorillas by making certain grunting sounds. On that particular day, our gorilla family was active, on the move, and little aggressive. We literally had to chase them as they moved around, but we did get very close to them on the rare moments that they stopped for a break. At one point, too close. We accidentally cut the family off as they were crossing the river such that half the family was on one side of the river and the other half on the other.  This agitated the silver-back.  And, the next thing you know, we got charged by a silver-back!  More on that below. Thankfully, nobody was hurt, but you could tell that the trekkers and the guides were worried! At the time, it was terrifying, but looking back, it was absolutely exhilarating.

In case you were wondering, don’t: You WILL know when you are getting near the gorilla family. How you might ask? Well, there is no graceful or witty way to put it, so I’ll  just say it: Mountain gorillas smell like piss. Apparently, this is primarily thanks to the patriarch silver-back/head of the family, and it is unmistakable. It’s one of those things where, you’ll know it when you smell it! With that said, let’s move on, shall we? You are not allowed to touch the gorillas, but sometimes they touch you.  In these moments, you have to sit extremely still and look down, do not make eye contact.  You get to spend about an hour with the gorilla family.

We later learned that all the other groups had found their families pretty early on and got to spend a chill hour observing them as they lazily laid around posing for pictures.  Not our group. We were the last group back. The gorillas charged at us at least two times.  One of those times, the silver-back male – all 500+ pounds of him – brushed past Chad and knocked over another member in our group who went flying into a pile of leaves. He later said that it was the hardest force he had ever felt, like being hit by a boulder. These gorillas are super strong. They can literally kill you with their bare hands.  The first thing the rangers told us was to not run away if we were approached by a gorilla.  Everybody forgot that rule! So, needless to say, we were all on edge.

After our hour was over, we hiked about another hour until we could find a place to stop for lunch.  It was an exhausting day, but absolutely exhilarating. Truly one of the most incredible experiences of my life. Back at the lodge, everyone traded trekking stories.  Ours was by far the worst (or, in hindsight, the best!).

The next day, we were scheduled for our second trek.  This time, we would be visiting part of the forest that was a close 10 minute drive from the lodge. Chad and I didn’t know what to expect.  We sat through another briefing and got assigned to trek the M family. We began our trek, but about 2 hours in our rangers and guide aborted the trek because it was reported that the M family was literally in a territory skirmish with another pack of wild gorillas, making it unsafe for us to visit them.

Our guides decided to re-route and found us the R family. I was elated to find the R family.  The R family is what trekking dreams are made of.  They are a pack of about 12 to 15 lazy and friendly gorillas.  They had a super-chill silver-back leader and 4 of the cutest babies I ever saw.  They could not have cared less that we were there. They laid around eating, while the babies played with each other and climbed the trees.  It was pure bliss! I felt like we were being rewarded after the trek we had the day before. The experience lived up to all the hype!

At the end of each trek, we were awarded with our trekking certificates! After that much physical activity, the least you deserve is an award!

So, what does one wear to trek gorillas?  Well, I’ll tell you.  Here’s a little hint: you are going to look ridiculous while you are trekking.  But, the good news is, so does everyone else. Relax. This is not a fashion show.  It’s a jungle.

Anyway, you will need a good, lightweight pair of breathable pants (preferably with pockets) and a breathable long sleeved shirt.  You MUST wear hiking boots with a sturdy pair of long socks. If you have boot covers, bring them.  Otherwise, you MUST tuck the bottoms of your pants into your socks.  If you do not, you will get ants in your pants.  Big, fire ants.  In your pants. You should bring a lightweight rain jacket and probably a hat or some other head covering. You MUST bring a sturdy pair of gloves, like gardening gloves.  If you do not have them, the park’s visitor center will rent or sell them to you.  During the trek you will be grabbing on to branches, vines, and plants, many of which have thorns. Finally, you will need a backpack that can hold your lunch, some snacks, your water, baby wipes (for when nature calls; you may also want to bring a Ziploc bag for your waste) your rain gear, and your camera equipment.

I am so glad that Chad and I got to check this one off the list.  It was really an incredible experience.  If you have ever though about doing it, go.  Just go. It was amazing. It was worth every dime we paid, and all the soreness we felt afterwards. It truly was an awesome way to close out a year of remarkable adventures!